MercuryDPM  Alpha
 All Classes Namespaces Files Functions Variables Typedefs Enumerations Enumerator Friends Macros Pages
Installing the Code

Preliminary Steps for Windows Users Only

Since MercuryDPM was originally designed for use with Unix systems, Windows users must first install suitable software to allow compatibility.

We recommend the program Cygwin, which can be obtained from http://cygwin.com/install.html.

After downloading and opening the relevant executable (.exe) file, follow the default instructions until you see a screen resembling the one below asking you to select packages:

CygwinPackages2.png

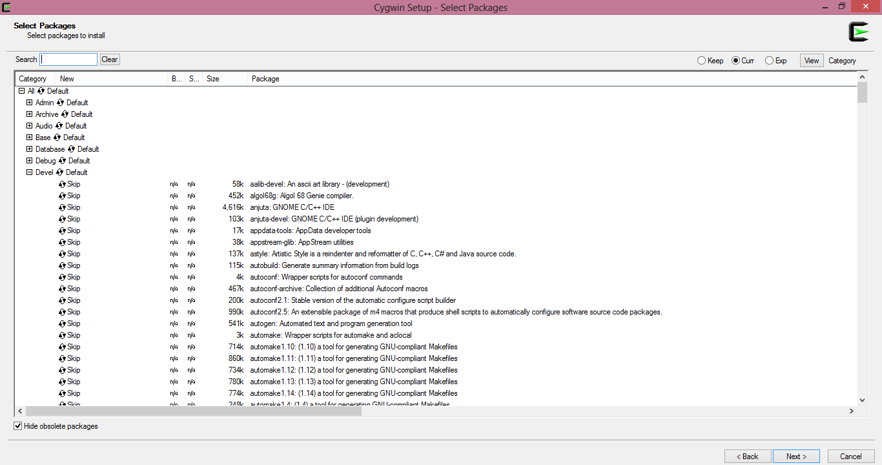
At this point, the packages listed should be included by clicking on the ‘+’ icon of the relevant heading and then clicking the name of the relevant package until a version number is displayed.

The majority of the relevant packages may be found under the ’devel’ heading which can be seen in the above image, although it may be easier to simply find the relevant packages using the search bar at the top-left of the window. It is not necessary at this point to fully understand the function of each package; for now, they simply need to be installed.

Necessary Packages

  1. Complete X11 package

  2. cmake: Cross-platform makefile generation system

  3. cmake-gui: Cross-platform makefile generation system (Note: cmake-gui is not available in the 32-bit version of Cygwin. For 32-bit machines ‘ccmake’ — which is included with cmake, above — may instead be used).

  4. make: the GNU version of the 'make' utility

  5. If you do not already have a c++ complier installed, you should also install the ‘gcc-g++ C++ compiler’ package, which is also under the devel heading.

  6. Optional: You may additionally wish to install ‘gnuplot’ and ‘gnuplot-x11’ which will allow you to easily and quickly visualise results produced using Mercury.

Note: It is highly advisable to keep your Cygwin updated to the latest version.

In addition to Cygwin, the installation of Mercury DPM will require an SVN client such as ’TortoiseSVN’, which may be downloaded from http://tortoisesvn.net. Once downloaded, TortoiseSVN may be simply installed using the default setup.

Once this process is complete, we are ready to download Mercury itself! This can be achieved by following the simple steps below:

  1. Open the Windows explorer.
  2. Choose a folder into which you want to copy the MercuryDPM source code, for example ‘’C:/cygwin/home/username/MercuryDPM’’
  3. Right click and select: ’’SVN Checkout…’’. You will then see the screen shown below:
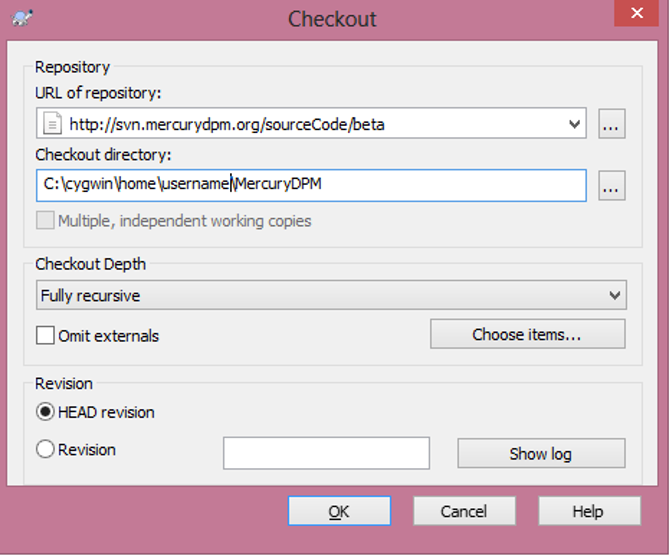
    CygwinCheckout.png

  4. At the url type ‘’http://svn.mercurydpm.org/SourceCode/Beta''
  5. Click ‘’ok’’ and wait for the checkout to finish. Click ‘’ok’’

Note: If you want to download the ‘’release’’ version of Mercury, simply replace ’’beta’’ in the above path with ’’release/[RELEASE NUMBER]’’. The number of the current release can be found on the Mercury website.

  • Open the "XWin Server" tool (under Start Menu -> Cygwin)††. You should now get a terminal similar to that used on Mac and Linux machines.
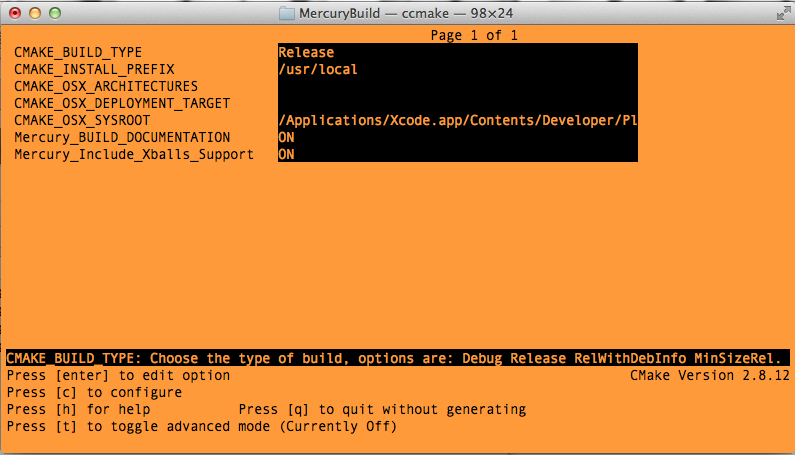
  • You are now ready to follow the installation steps listed below for Mac/Linux users. If cmake-gui is not installed use ccmake instead.

††It should be noted that the ‘’XWin Server’’ is not the same as the main Cygwin terminal.

General Requirements for All Operating Systems

  • Compiler with c++11 features, for instance clang 3.4 or higher.

  • svn (‘subversion’) version 1.7 or above; this can be downloaded from https://subversion.apache.org/

  • cmake version 2.8 or higher (http://cmake.org/cmake/resources/software.html)

  • Optional: doxygen, which may be used to create documentation while building your own source code.

  • For Mac users, the latest version of Xcode is recommended; if you want to visualise your results, XQuartz may be installed as an alternative to X11.

Once the above procedures have been followed and the relevant packages installed, we are ready to begin installing Mercury!

Installation steps

For Mac/Linux users
  • Open the terminal or shell. Create a directory called "MercuryDPM", at a location of your choice, by typing
    mkdir MercuryDPM
            
  • To get into mercuryDPM, type
    cd MercuryDPM/
            
  • Once in the folder MercuryDPM, download or check out the beta version of the DPM source by typing

    svn checkout https://svn.MercuryDPM.org/SourceCode/Beta MercurySource
            

    The above command downloads the DPM source code into the folder named "MercurySource"

  • In the current folder, i.e. mercuryDPM, create another directory called "MercuryBuild"
    mkdir MercuryBuild
            
  • Get into the folder "MercuryBuild" by typing

    cd MercuryBuild
            
    With cmake GUI
    • Assuming cmake is successfully installed, go to the newly created "MercuryBuild" directory. From here, you can create the executables from the Mercury source code by typing:
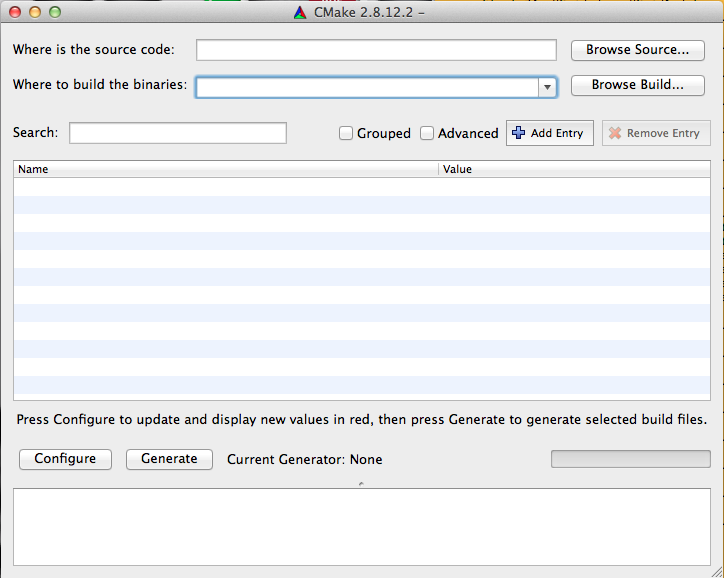
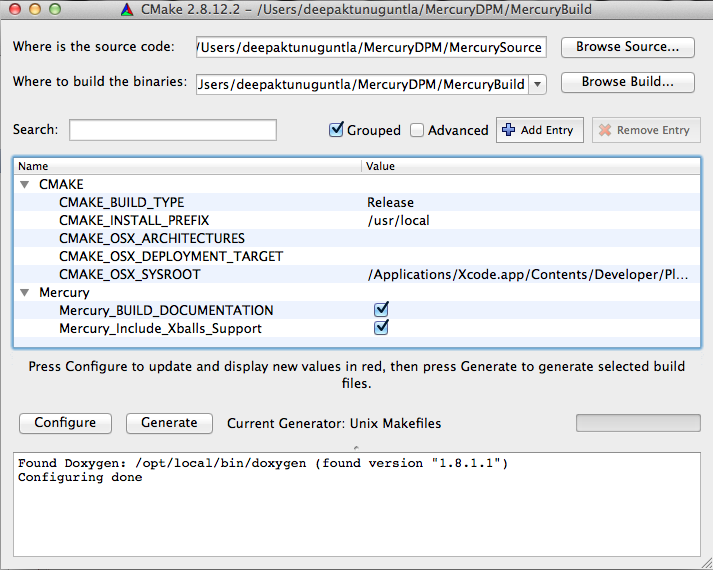
      cmake-gui ../MercurySource/
                  
    • A GUI pops up on your screen as in the picture shown below
      cmake-gui1.png
      1. Click on "Browse Source" and locate the "MercurySource" directory.
      2. Click on "Browse Build" and locate the "MercuryBuild" directory.
      3. Make sure option "Grouped" is selected and "Advanced" is deselected.
      4. Click "Configure"
    • After clicking on "Configure", the following window appears on your screen:
      cmake-gui2.png
      1. Select "Unix makefiles" under specify the generator for this code
      2. Choose "use default native compilers"
      3. Click on "Done"
    • Clicking on "Done", builds all the files in the directory "mercuryDPMSource" and creates the executables.
    • The building/installation progress is visible in the bottom panel of your cmake window screen, as seen in the screenshot below.
      cmake-gui3.png
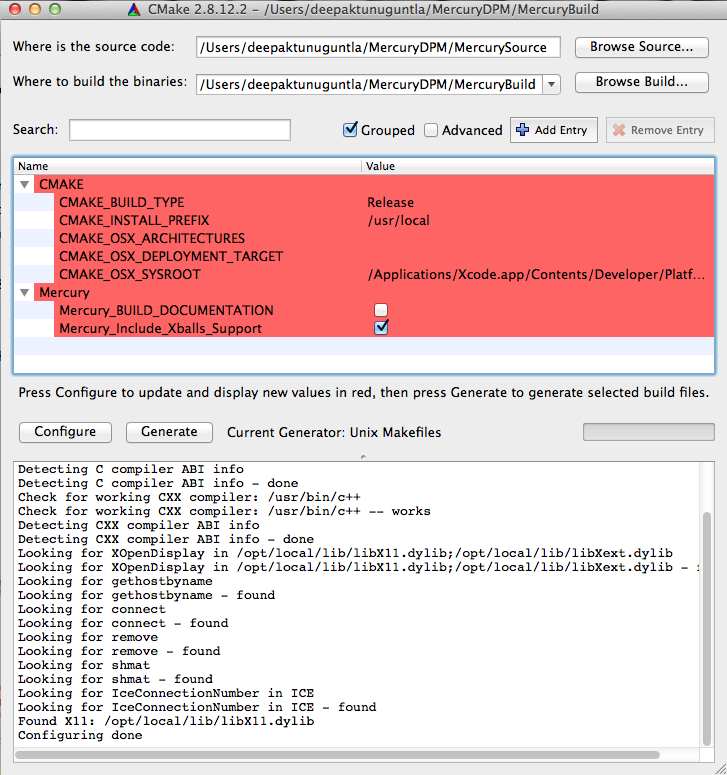
      1. Any red line in the bottom panel, indicates that some package is missing or needs to be installed to have a successful "configure". In that case, click on the "Advanced" option to see exactly where the issue is or contact any of the MercuryDPM team of developers.

        Among the more frequent error messages are:

        1. X11_XRES_INCLUDE_PATH or X11_XRES_LIB not found
          You are missing the X11_XRes library; in Ubuntu, you can install them by opening a terminal and type
          sudo apt-get install libxres-dev
                                  
        2. X11_XRT_INCLUDE_PATH or X11_XT_LIB not found
          You are missing the X11_Xt library; in Ubuntu, you can install them by opening a terminal and type
          sudo apt-get install libxt-dev
                                  

        Some more solutions for common problems are mentioned here: http://mercurydpm.org/downloads/trouble-shooting.

      2. Once configured for the first time, under the group named 'CMAKE' type 'Release' at 'CMAKE_BUILD_TYPE'. See the picture above.
    • Optional: for documentation tick the box make_BUILD_DOCUMENTATION, in the picture as shown below, before you click on configure.
      cmake-gui4.png
    • Once you entered all options and configured, click on 'generate'.
    • To check if successfully installed, go to your build directory "MercuryBuild" using the terminal and type
      make fullTest
                  
    • If all the tests have passed, MercuryDPM is successfully installed on your machine.
    Without cmake GUI
    • For users without the GUI, cmake does include an alternative curses-based interface called 'ccmake'.
    • At the terminal, in directory MercuryBuild type
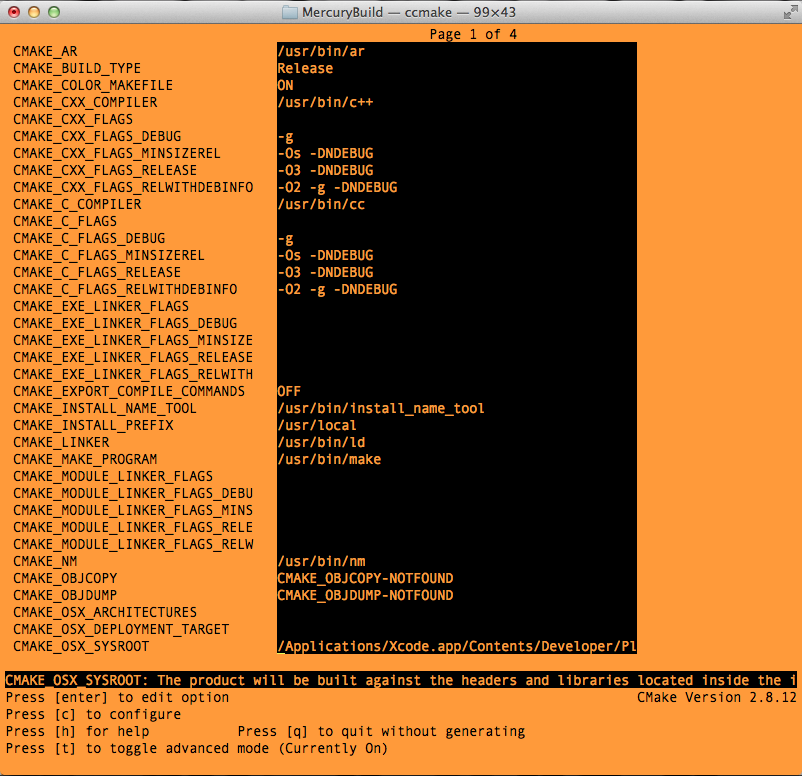
      ccmake ../MercurySource/
                  
      ccmake-1.png
      1. As seen in the above picture, pressing the key 'c' configures or builds the object files or executables from the source directory (MercurySource).
      2. Moreover, before configuring, 'BUILD_DOCUMENTATION' or/and 'Xballs_Support' can be enabled or disabled.
      3. Cmake experts can toggle to advanced mode by pressing the key 't' to have more options and choices.
      ccmake-2.png
    • Once configured, press the key 'g' to generate the executables.
  • To check if successfully installed, go to your build directory "MercuryBuild" using the terminal and type
    make fullTest
            
  • If all the tests have passed, MercuryDPM is successfully installed on your machine.

mercuryDPM mailing list